
Overview
Cameyo offers a trial that lets you discover many of the great features of the Cameyo Virtual Application delivery platform and gets you started installing, publishing, and deploying apps to your trial testers. The trial is available for 30 days, and is limited in scope to 5 users and 2 published apps.
Here’s a step-by-step process that will guide you through your initial configuration.
Step 1: Requesting a Trial
If you do not have access to the Cameyo Admin console, you will need to request a license from Cameyo. Please request a trial through the website or send an email to sales@cameyo.com
Step 2: Activate the Trial
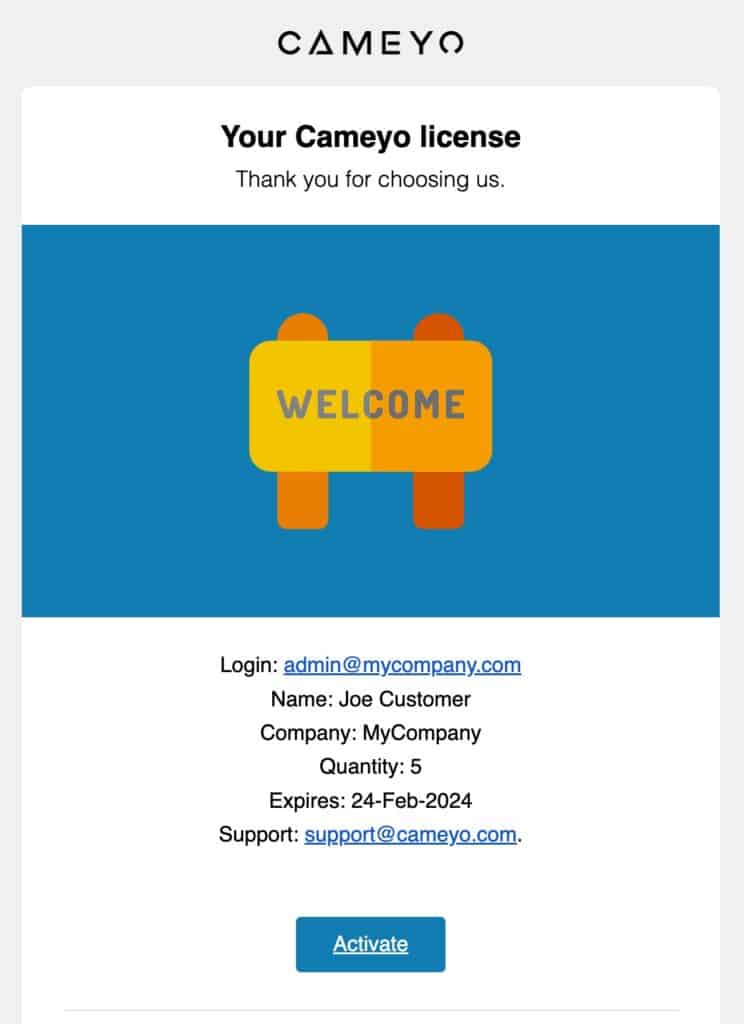
Once you have been approved, you will get an email in your inbox from the Cameyo license portal. If you do not receive the email, be sure to check the junk/spam folder.
Click the “Activate” button and follow the link.
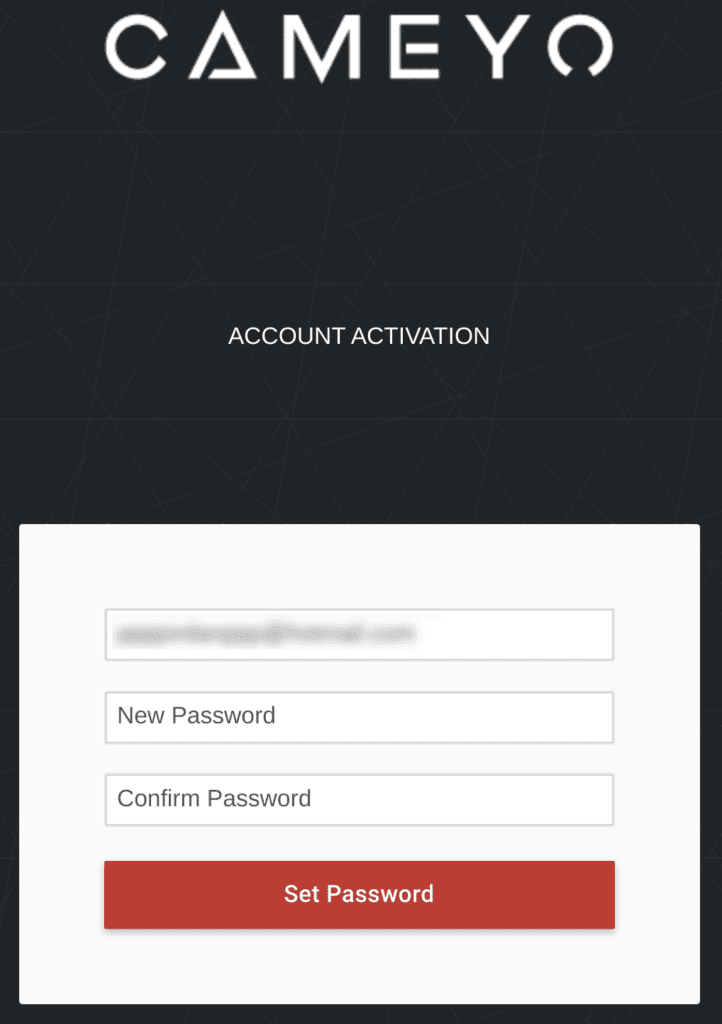
Set a new password
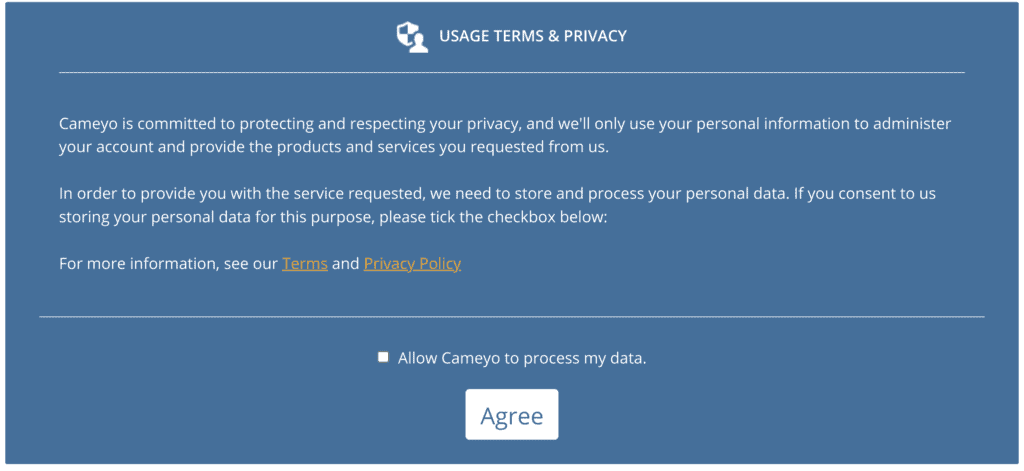
Click “Allow Cameyo to process my data” and select “Agree” on the Usage Terms & Privacy” agreement.
Step 3: Create a server
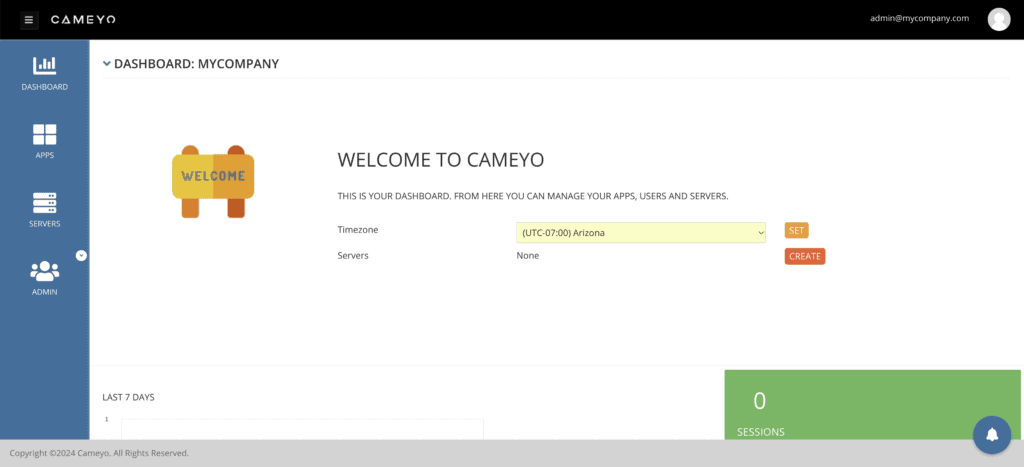
On the Dashboard page, select your time zone and click “Set”. Then click on “Create” next to Servers. You may also select “Servers” on the left, then click “+ ADD”.
On the “Add Server” page, you have two options. For the trial, we will use the “Cloud Server” or fully-hosted option. If you are interested in the self-hosted option, please follow the steps in this article: Setting Up a Cameyo Self-hosted Server.
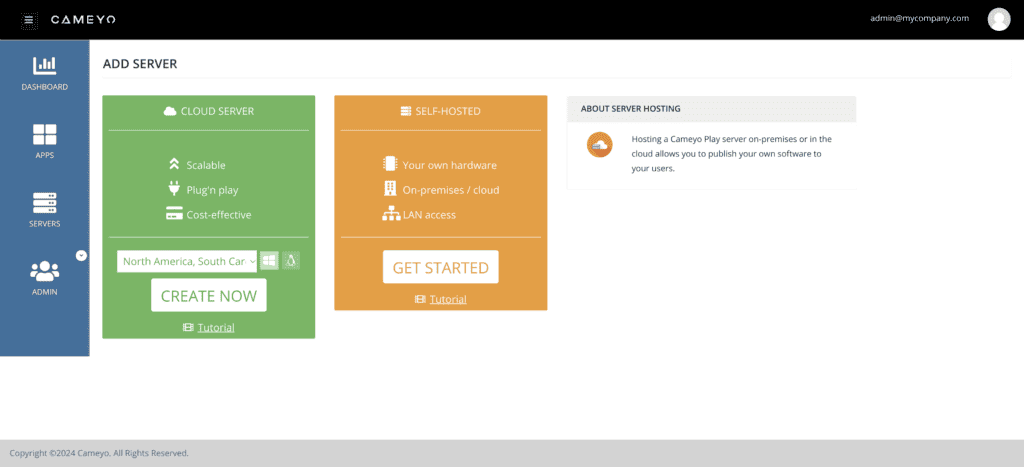
Fully-hosted Cameyo creates servers in the Google Cloud. This option simplifies server management and maintenance and allows you to easily create elastic clusters to load-balance large numbers of users.
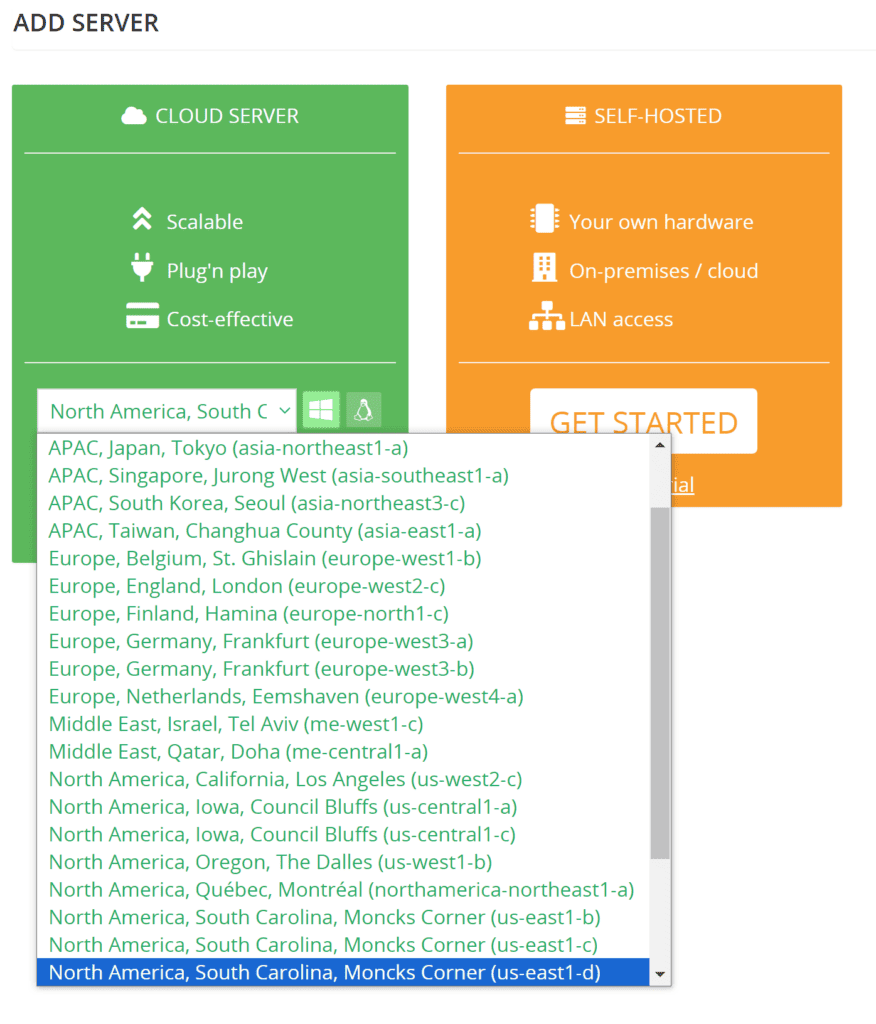
Select the Google data center nearest you or your users and select “Create Now”
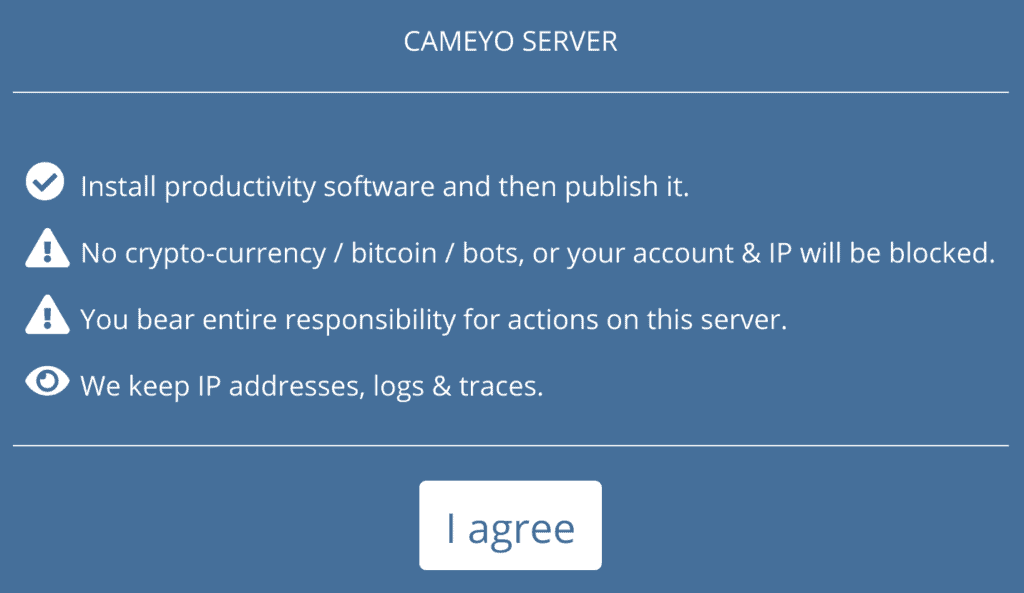
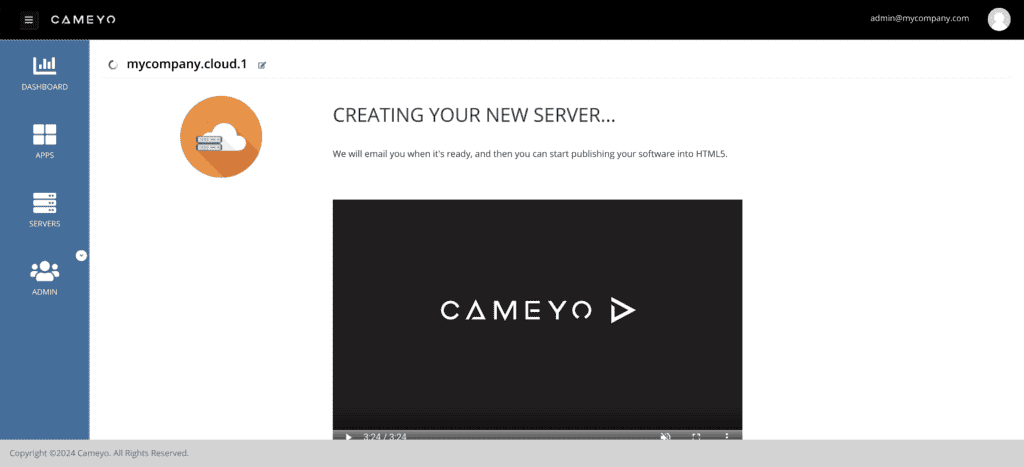
Select “I agree”. Creating a server about takes 3-5 minutes.
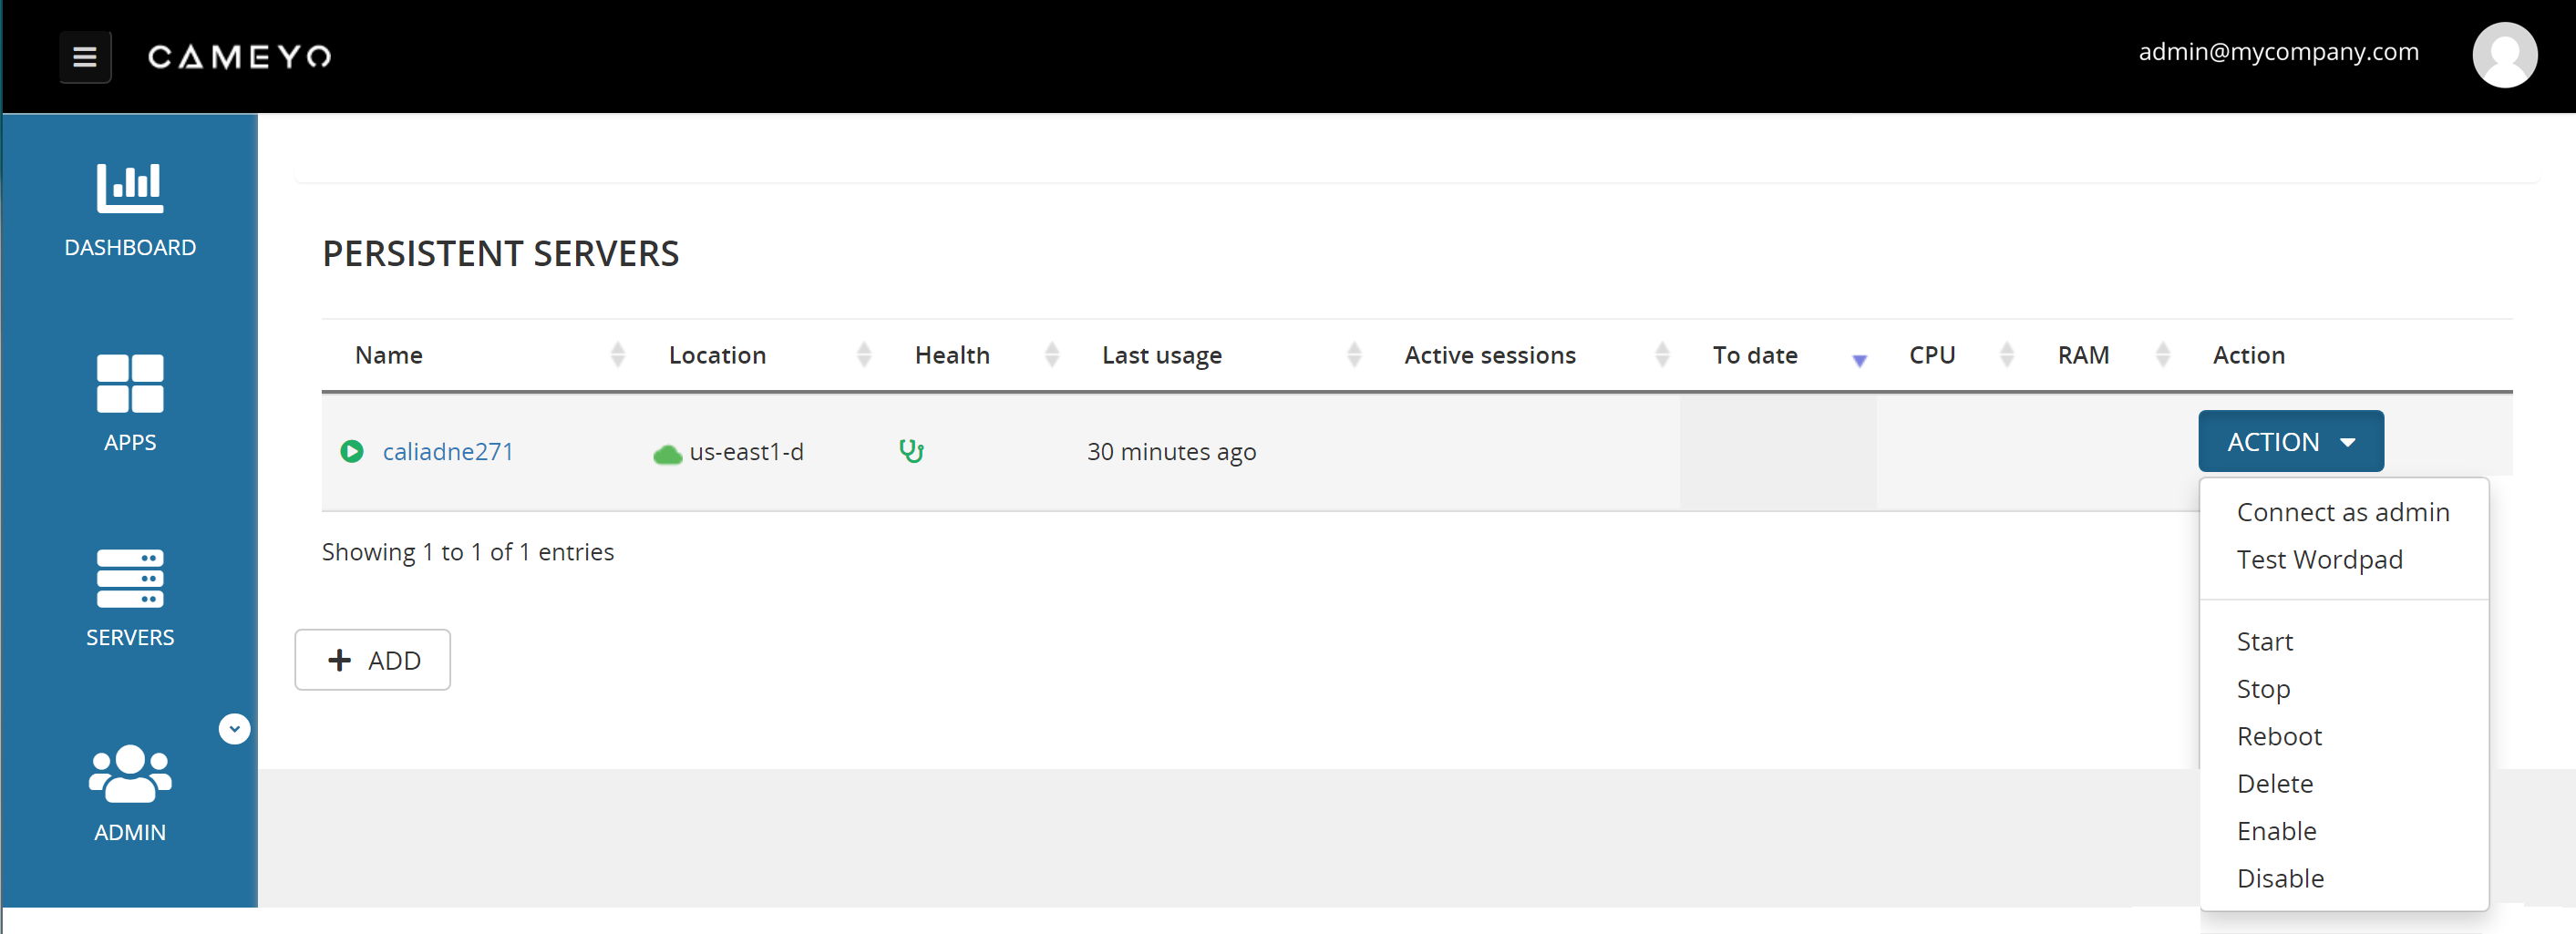
Once the server is created, the icon next to the server will turn green. You will also see a “Connect as Admin” button next to the server. (These same options are available on the “Servers” page in the blue bar on the left.)
Step 4: Install an App
Once the server is ready, connect to the server as an Admin and install your app. Select “Servers” from the blue bar. Make sure the server is listed and it has a green icon next to it. Select “Action” and “Connect as admin”
Once you connect, you will see a familiar desktop interface as you are logged into this Windows Server as a local Admin. Here you will install apps. The dialog in the middle guides you through the process.
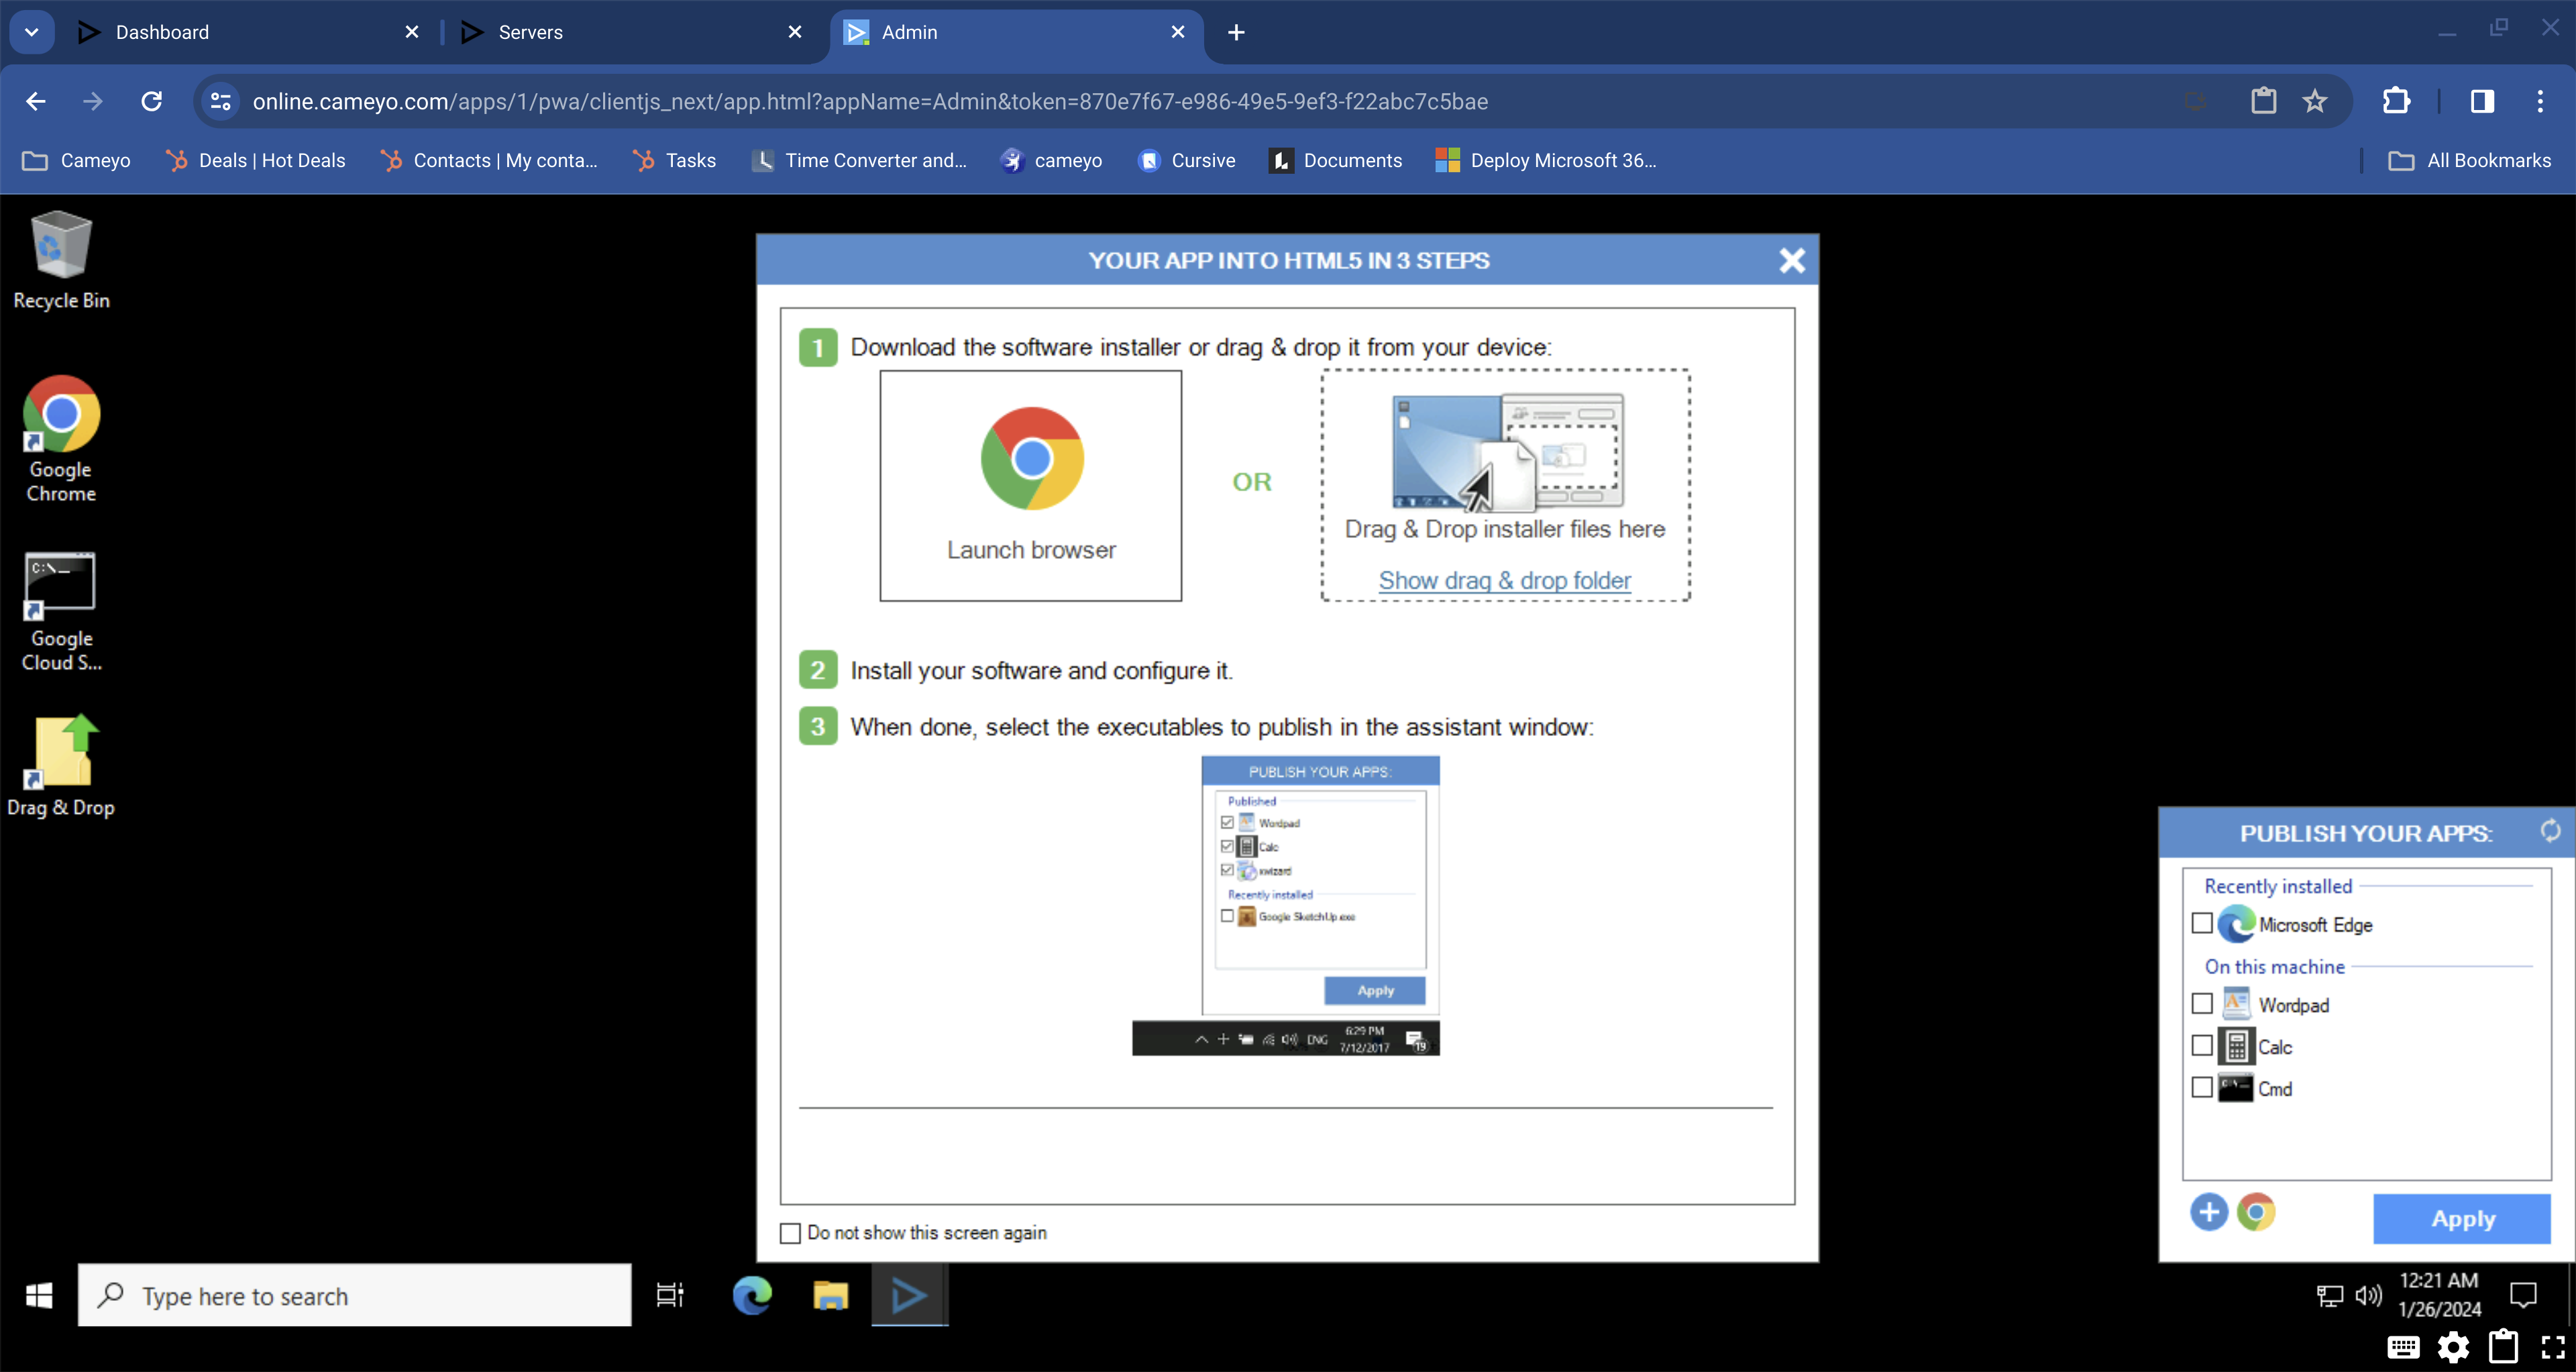
To get you started, let’s deploy a simple application. If you are only interested in hosting more complex applications, it’s still a good idea to install a simple app first (such as Notepad++) to make sure the system is working properly, before moving on to your more complex applications. Launch Chrome on the server, either via the desktop shortcut or by clicking on “Launch Browser” in the “Your App Into HTML5 in 3 Steps” dialog. Do a search for the Windows installer file for Notepad++ (or app of your choice) and download it to the server.
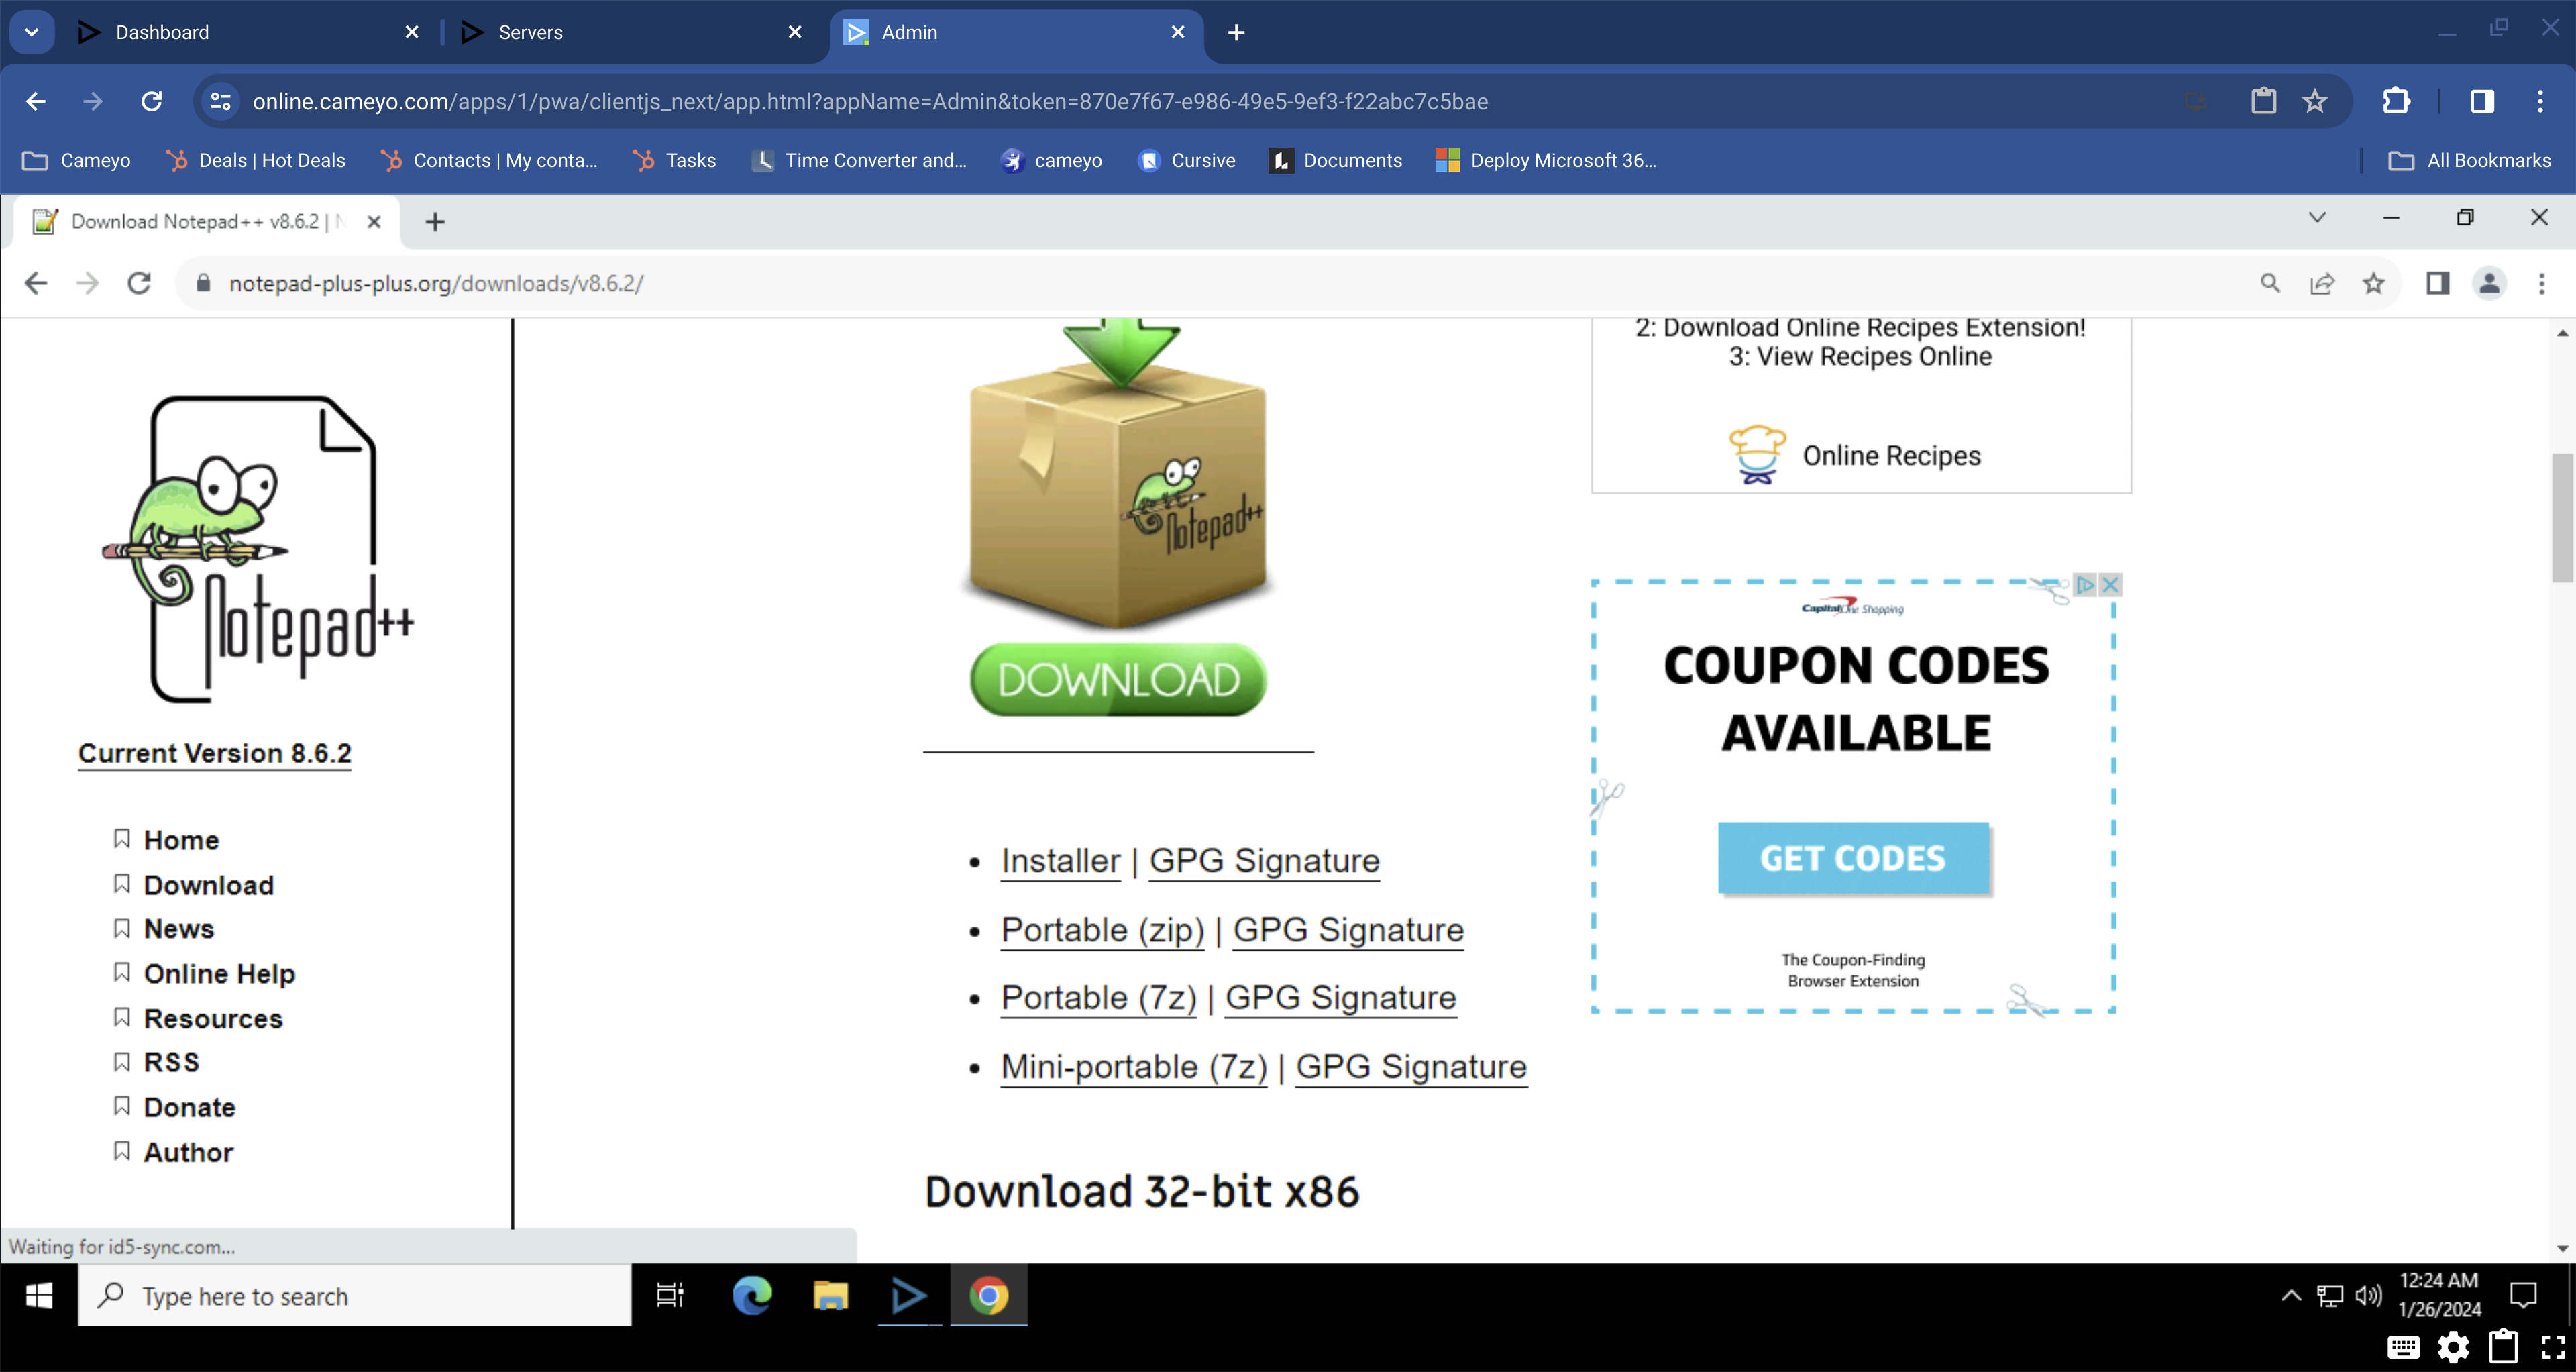
Then run the installer normally as if you were on a Windows workstation.
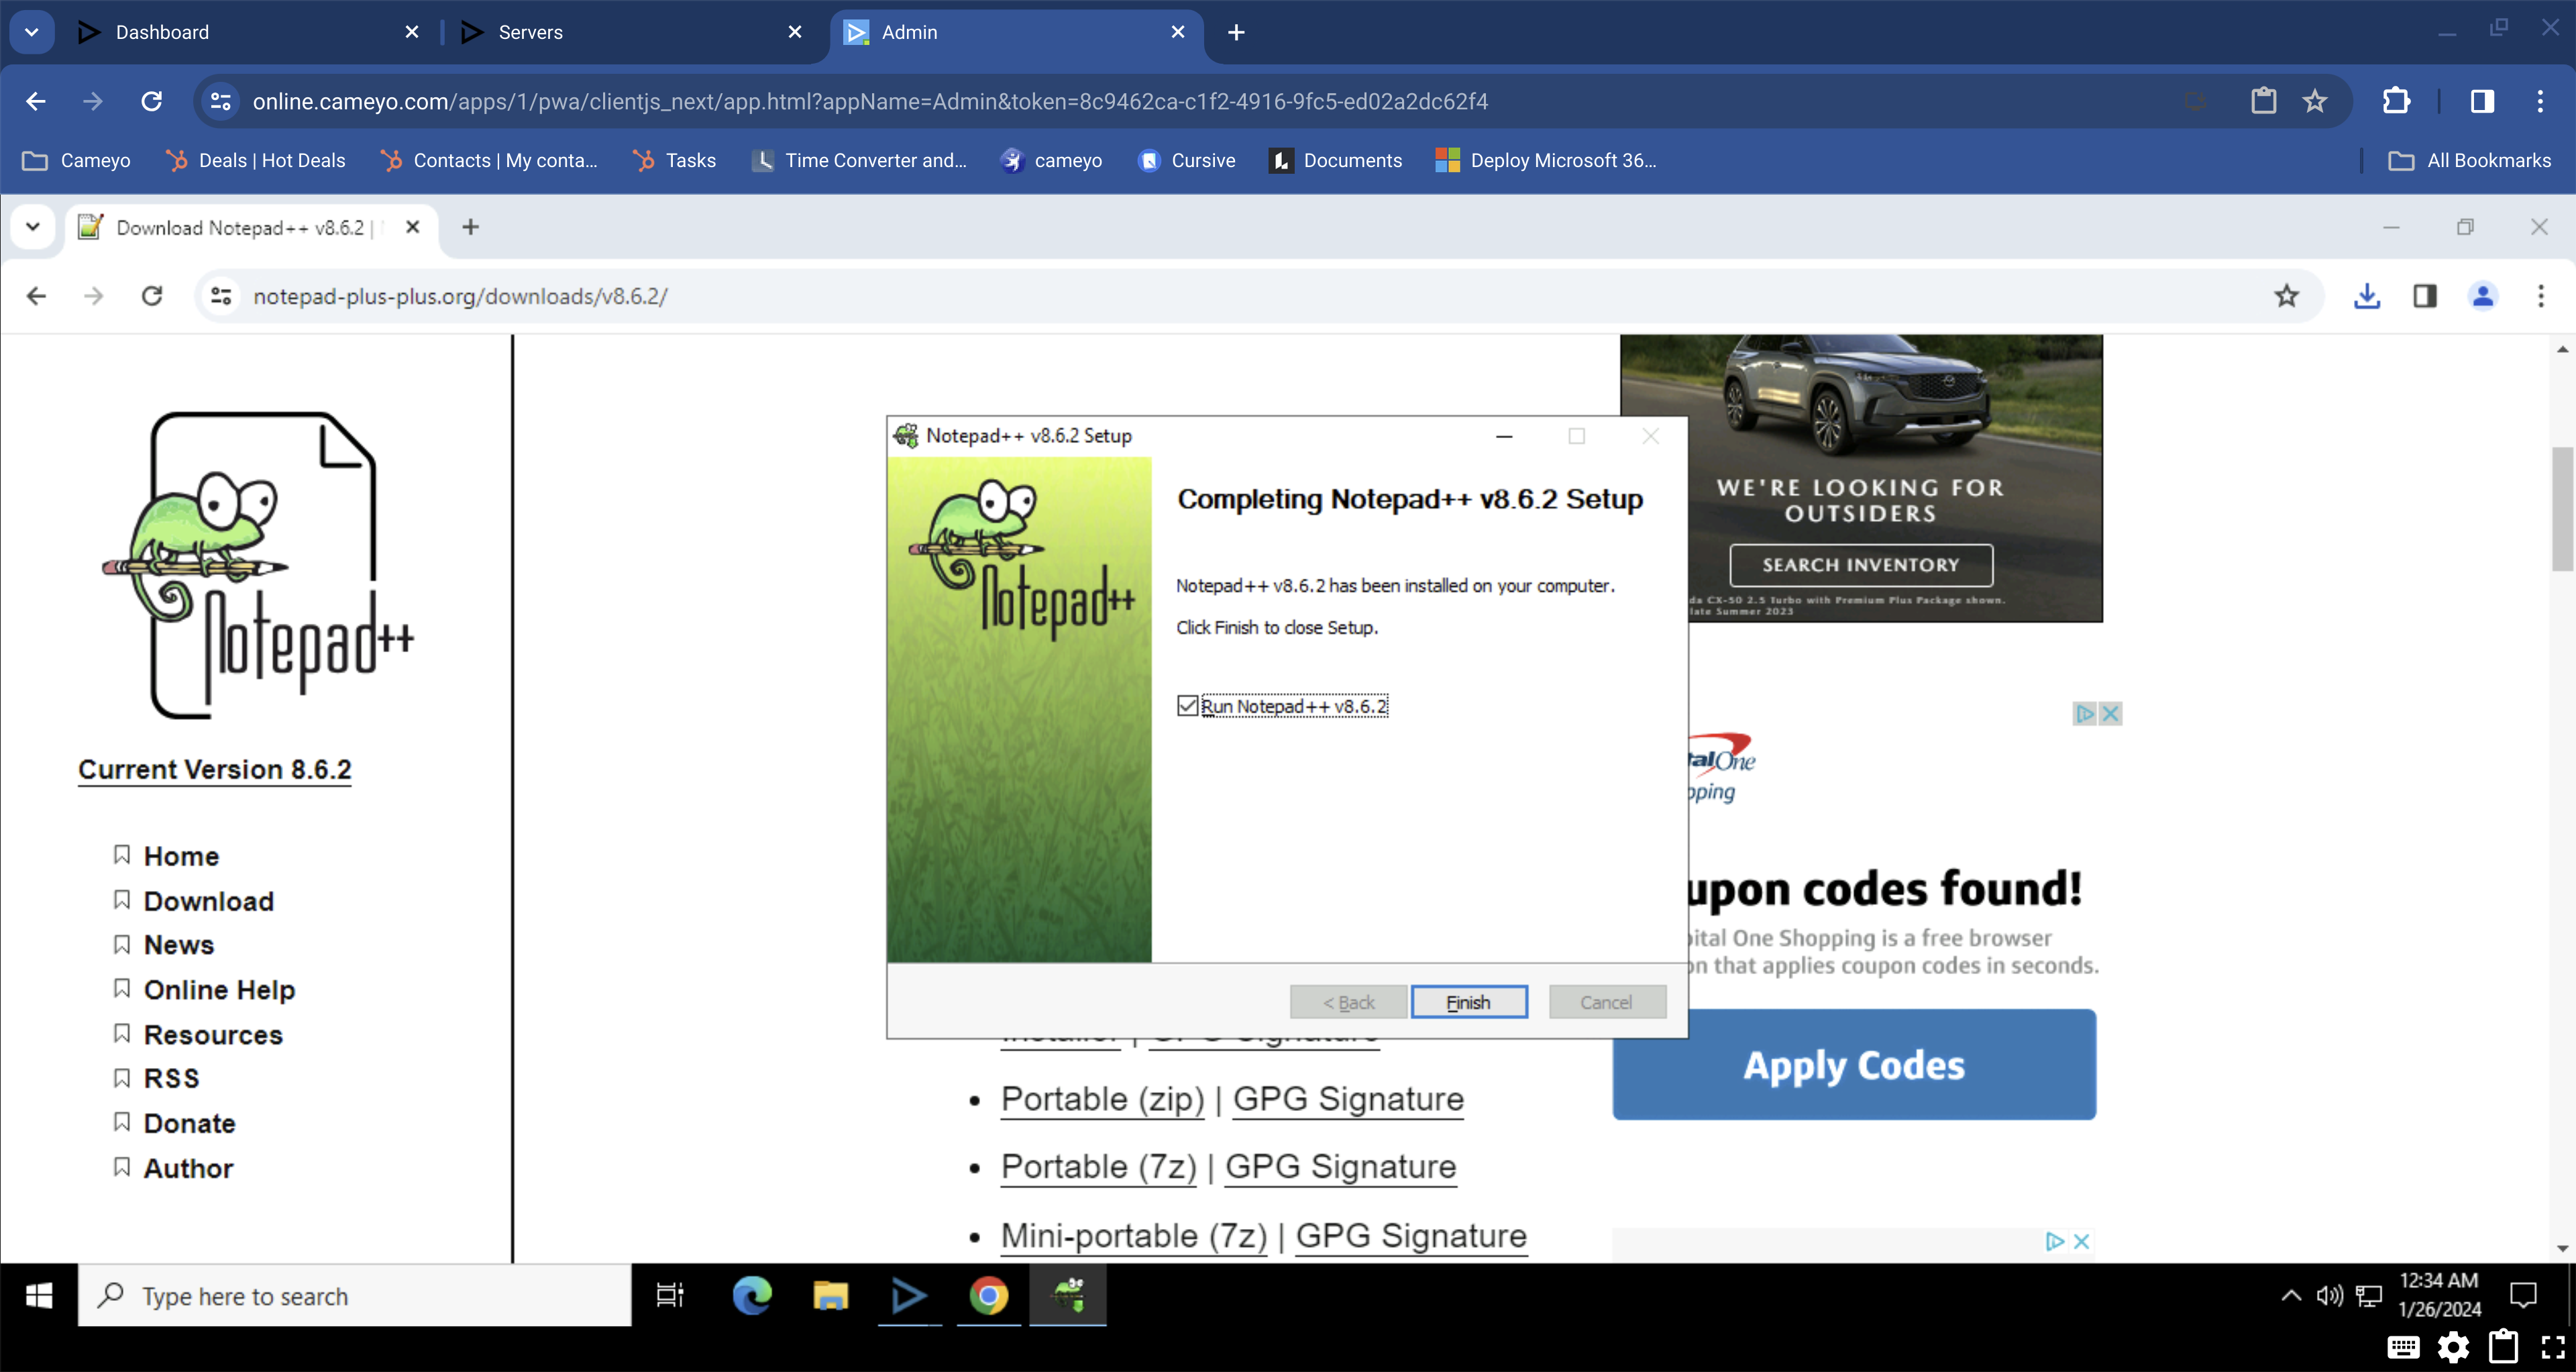
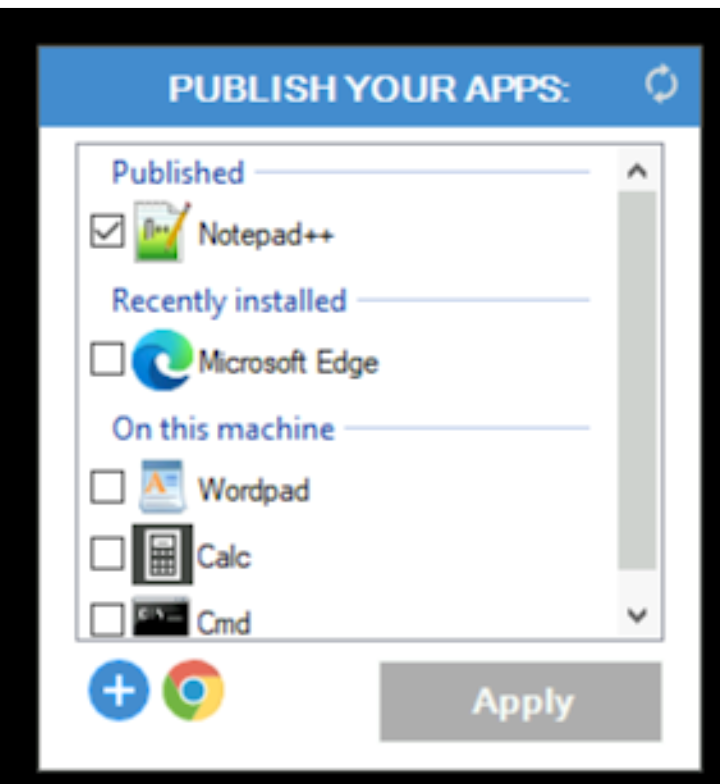
Once the installer finishes, you will see Notepad++ (or your other app) in the dialog on the bottom right. Just check the box next to the app and select “Apply.”
More information about installing and publishing applications on Cameyo
Step 5: Deploy your app
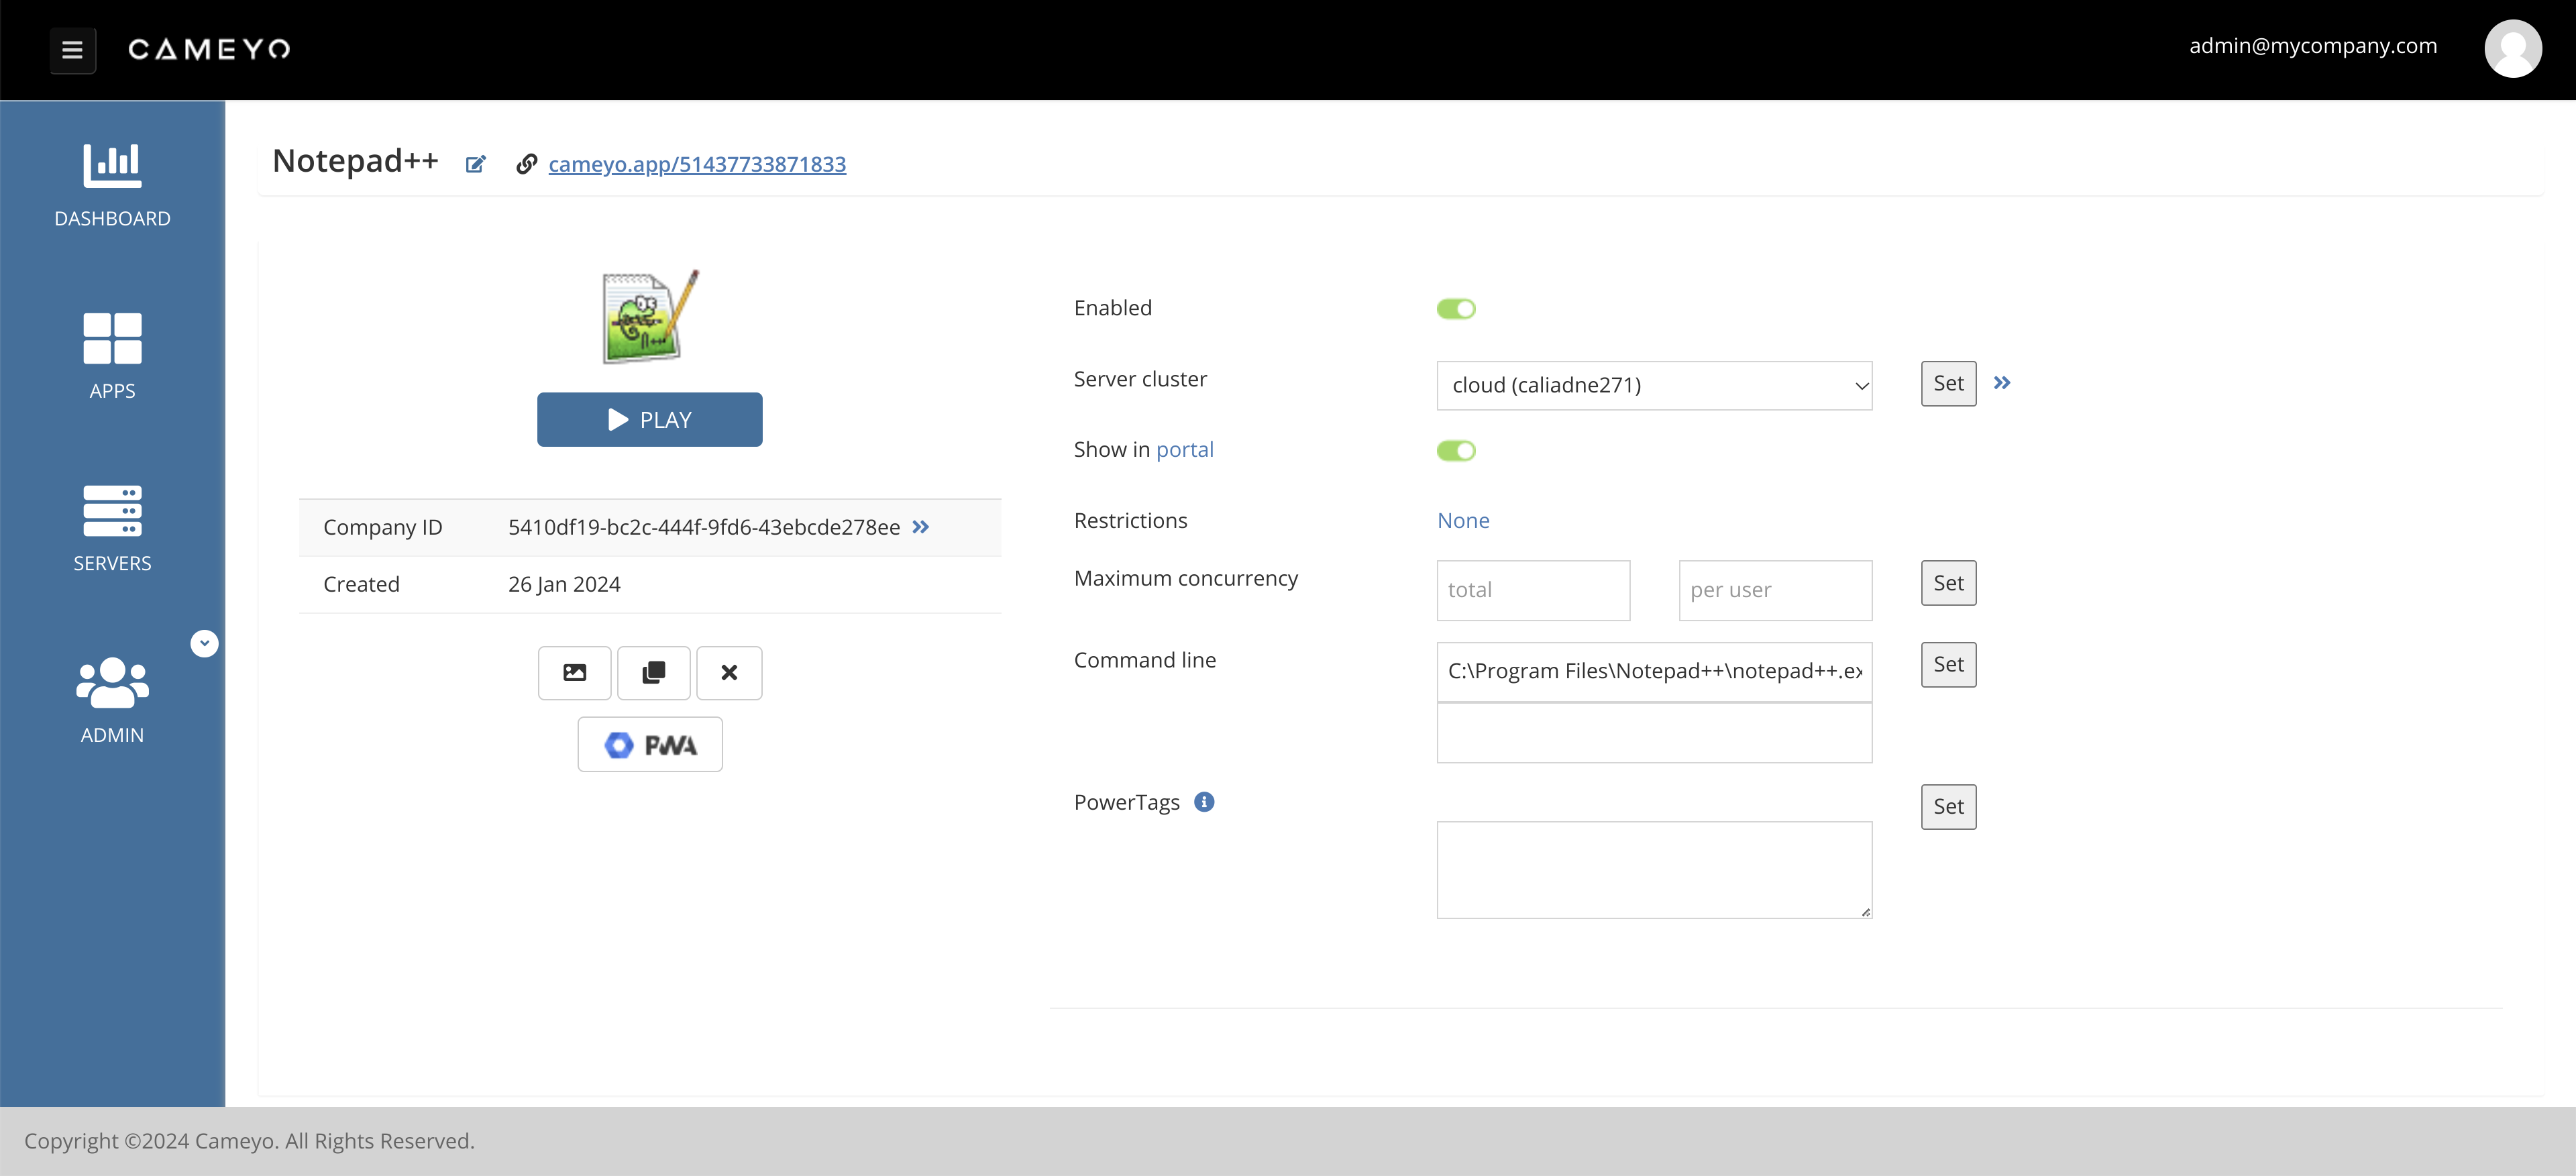
Select the browser tab that takes you back to the Cameyo Portal. On the blue bar on the left, select “Apps.” You will now see your newly-published app in your portal. You will need to deploy this to your end users. To do so, click on the app icon or the “i” icon to get to the app’s options.

Let’s deploy the app in the Cameyo portal. On the right-hand side, click the slider next to “Show in portal”. This app is now available in your portal for end users.
More options:
Step 6: Configure SSO and cloud drive access
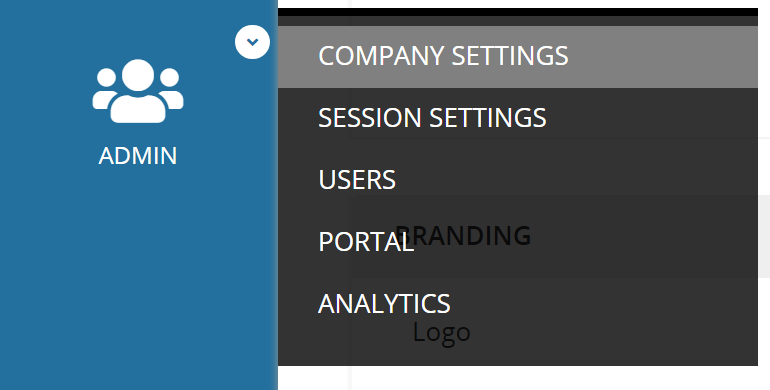
Select “Admin->Company Settings” from the blue bar.
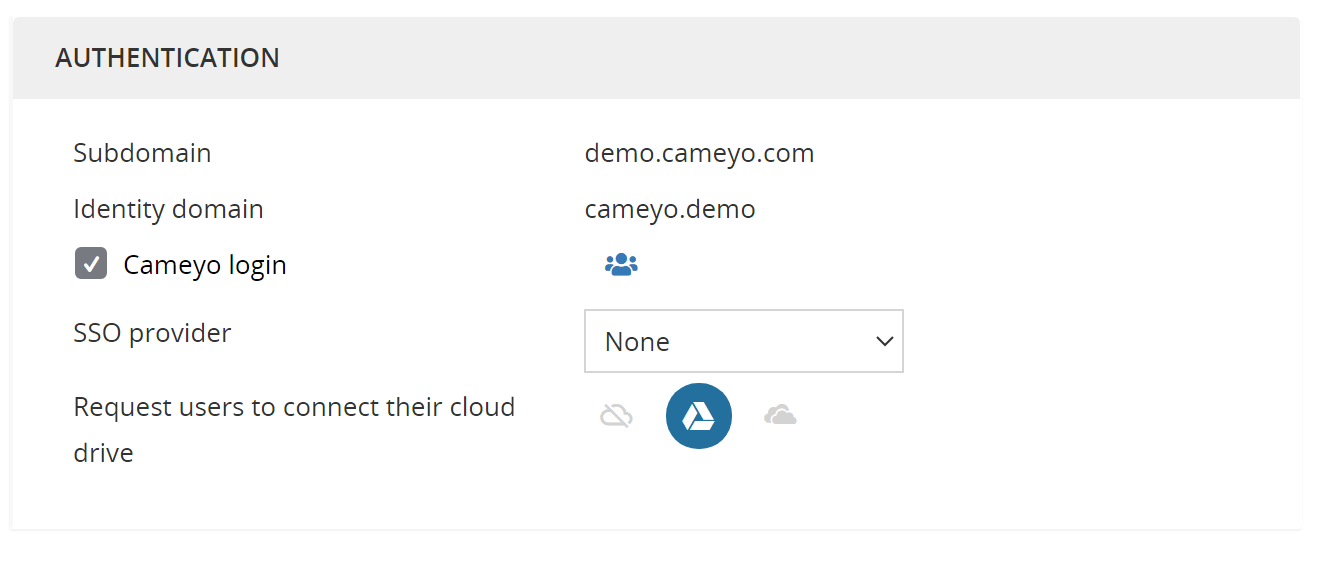
In Authentication section on the right, the subdomain will be your portal address. So if your company name is MyCompany, then you can go directly to https://mycompany.cameyo.com to access your custom portal.
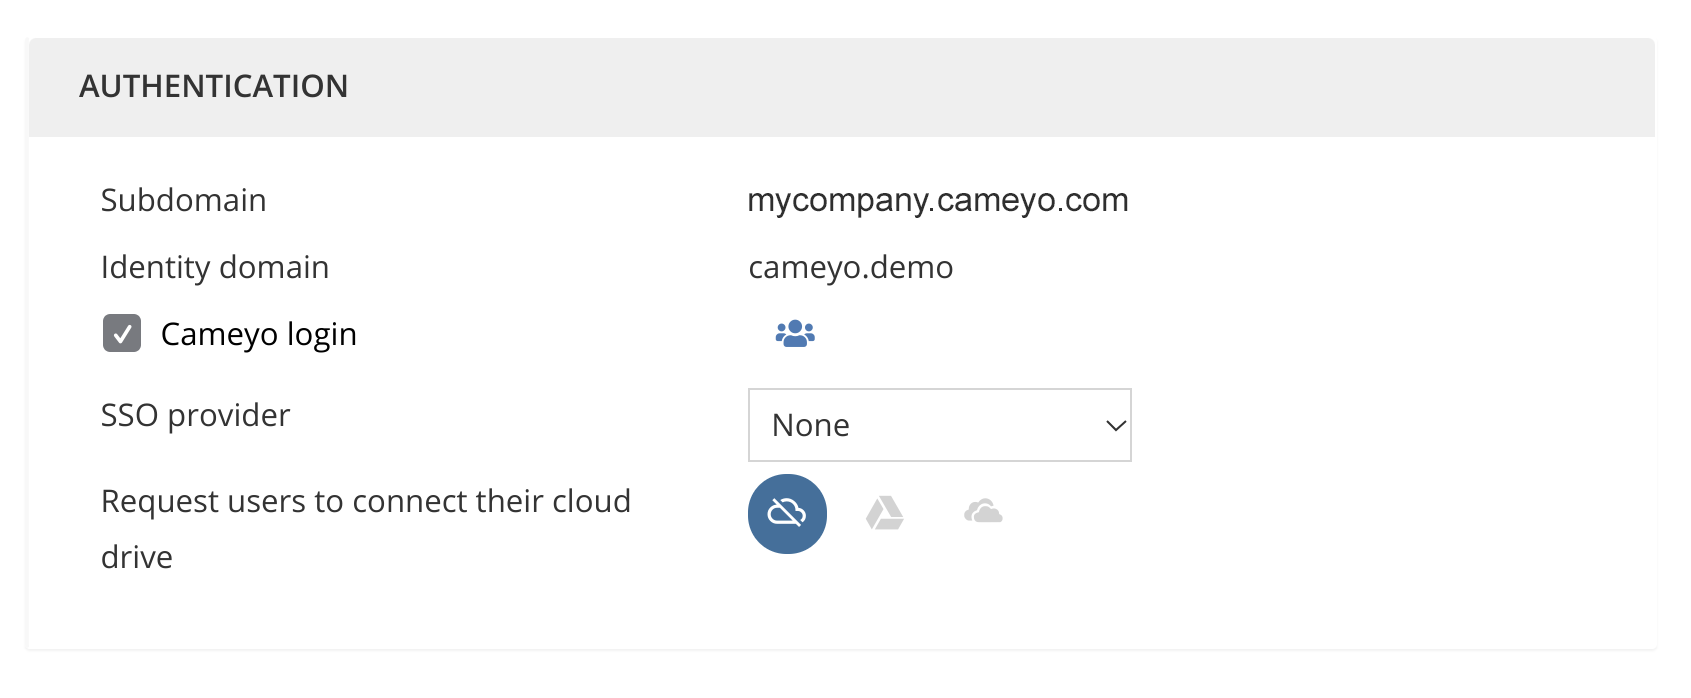
Make sure the identity domain field matches your company’s SSO domain. You may need to click “Claim Domain” if there is not already a domain specified here. If you need to change this domain, or add multiple domains, send a note to support@cameyo.com for help.
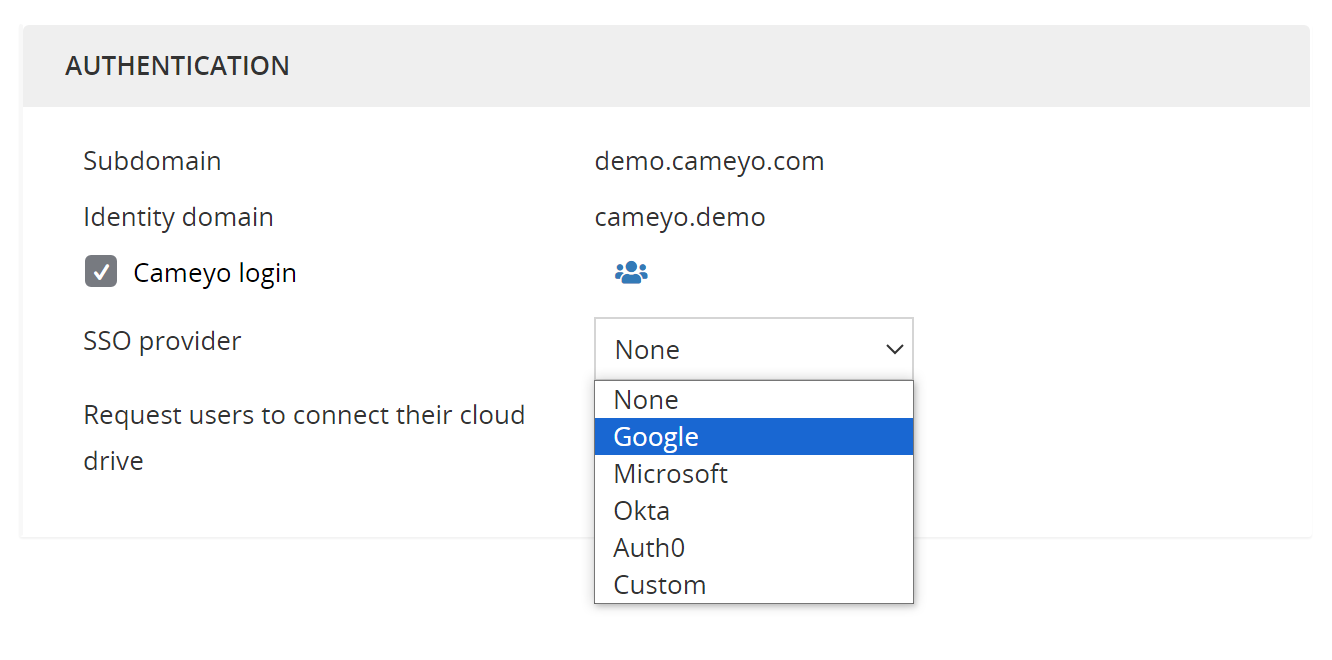
In the SSO provider dropdown menu, select your company’s SSO provider from the list of options or select “Custom” to add a different one. More information about SSO.
From here, you can select for your company to use Google Drive or OneDrive by selecting one of the options next to “Request users to connect their cloud drive”.
Hit the “Save” button below.

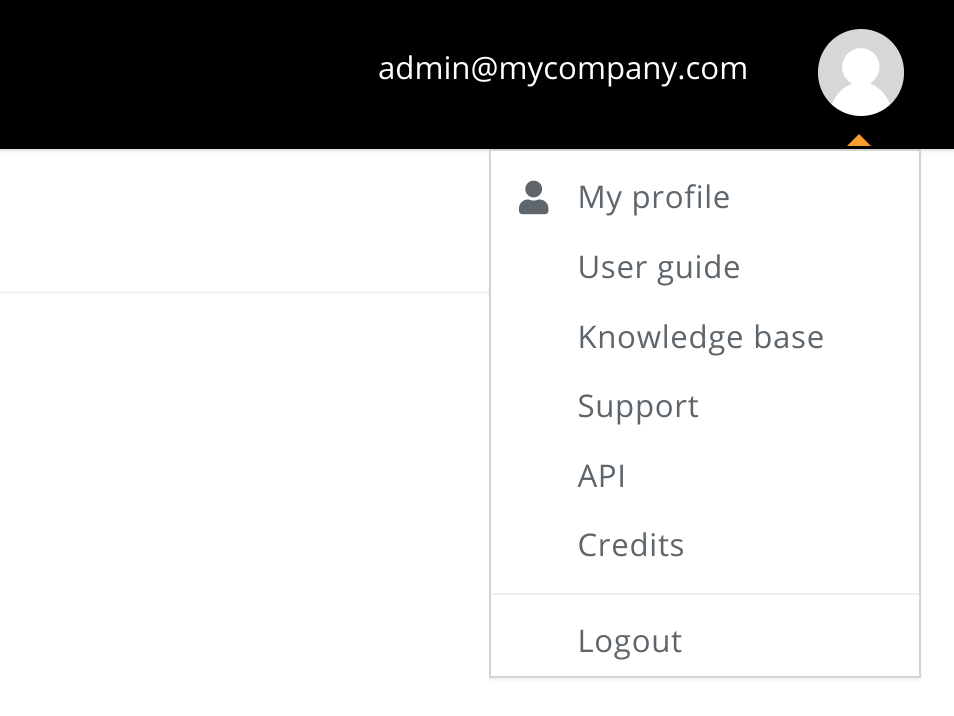
On the top right, select the shadow next to your user name in the black box and select “Logout”.
Then select enter your portal address (https://mycompany.cameyo.com) in the browser address bar or select the link to log back in. This will redirect your login to your SSO provider before you get back into the dashboard.
That’s it! If you need help, please email sales@cameyo.com